Blunder
Changelog v0.1 - v0.6.1
0.6.1 Update:
- Meshes now spawn with their base at 0, 0, 0, rather than their center
- Added more objects to Unreal Objects Panel:
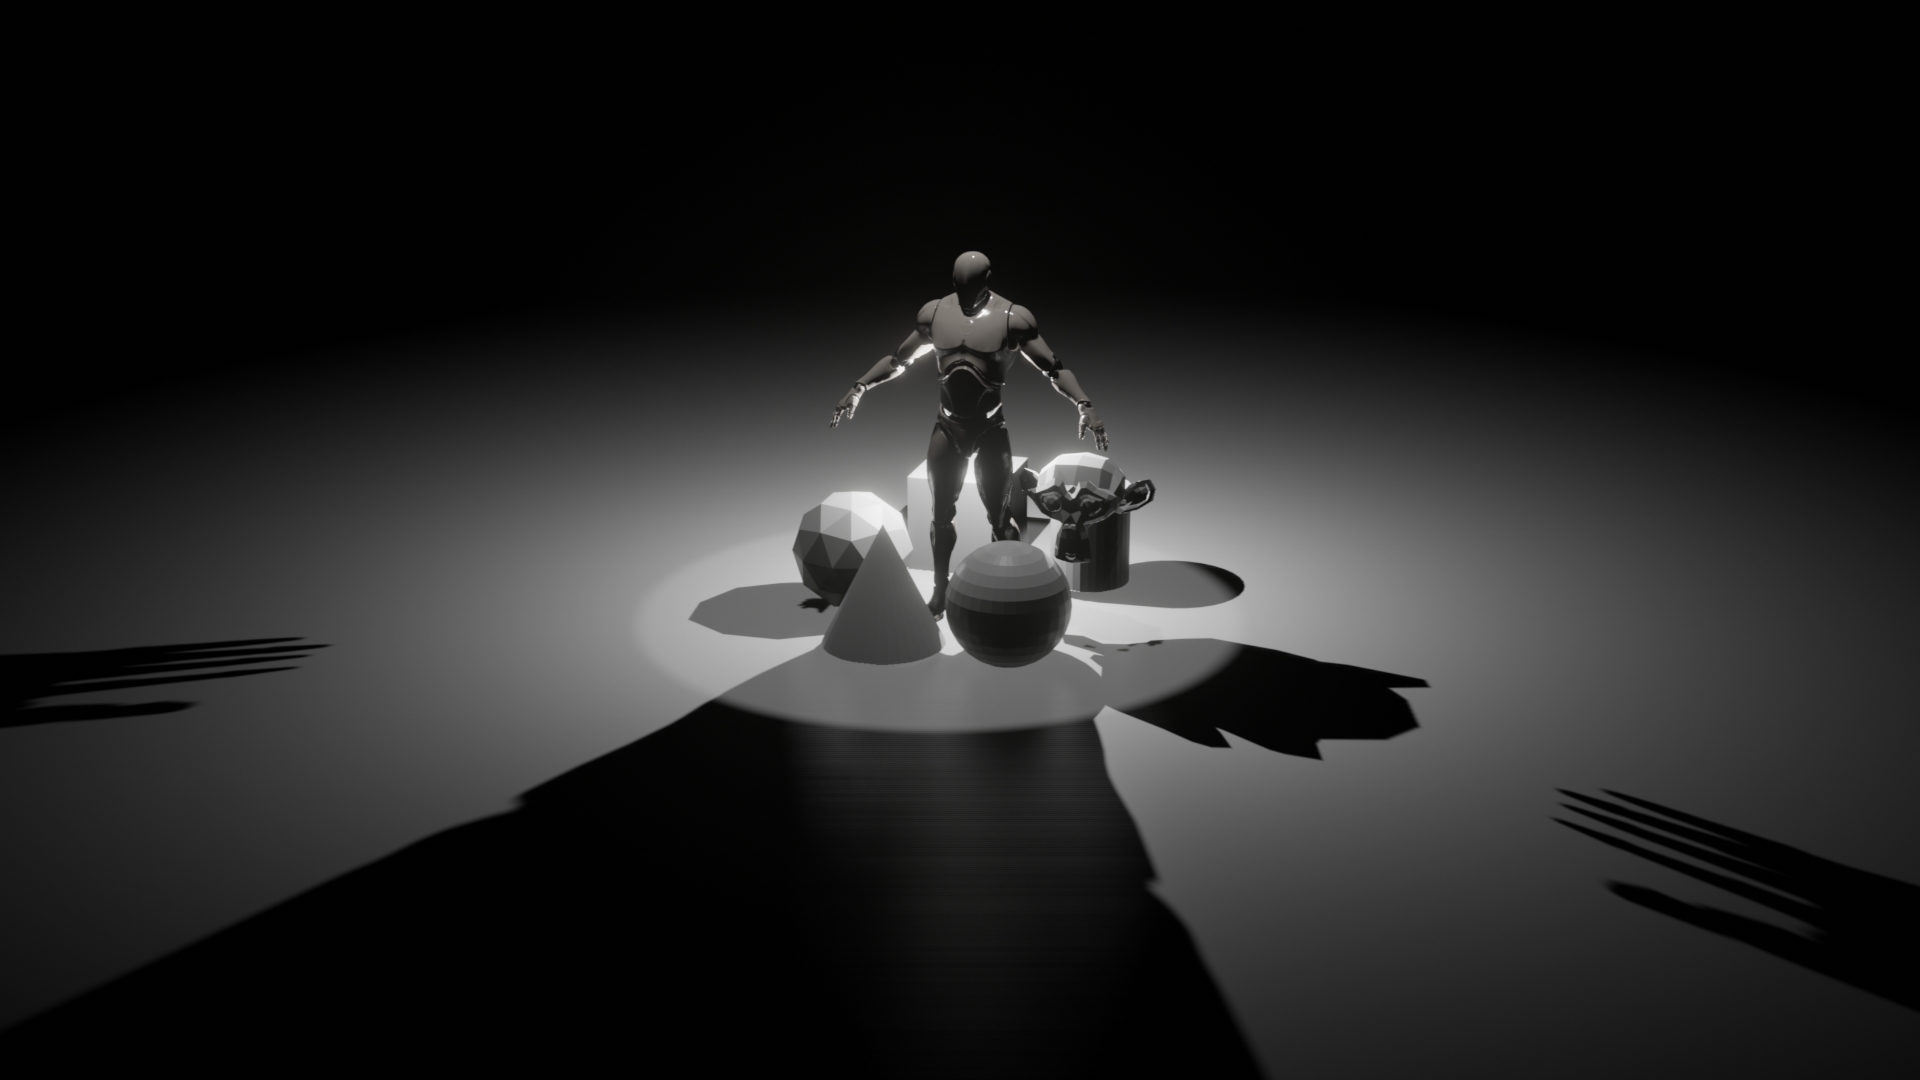
- Basic Mannequin Skeleton:
- follows Unreal Mannequin bone hierarchy minus IK, FK and Twists
- auto generates stand-in meshes to help visualize how Unreal will treat the bones
- actual Unreal oriented bones can still be seen in Edit Mode
- Floor Plane for an instant floor
- Mirror Cube and Mirror Sphere will add a mesh, bisect it, then add a Mirror modifier, quick timesaver
- HardSurf Plane and HardSurf Cube will add a mesh, bisect it, add a Mirror modifier, add a Subdivision Surface modifier, add a Bevel modifier, add another Subdivision Surface modifier, then set object shading to smooth for a nice, clean Hard Surface look
- Bool Tools add-on removed in favor of Jayanam's JMesh Tools, which has similar functionality
- Dawid Huczynski's Simple Asset Manager add-on added
- changed MatCaps used in Layout, Modelling and Sculpting Workspaces
0.6 Update:
- Jim Kroovy's Mr Mannequin Tools v 1.3 added, proper Mannequin w materials, rigged, ready to animate!
- fixed keymap conflicts in Sculpt Mode
- added Unreal Objects panel and menu (https://github.com/SpectralVectors/UnrealObjects)
- this contains operators for preset meshes, lights and camera that work at 0.01 scale
- Clip End of Viewport extended to 10000000
- added "Comment Box" operator, rewrite of Node Wrangler NWFrameSelected, prompts for label immediately
- added Blender Guru's Polligon Nodes for tiling textures and more
- added sonnenbrillenbrauchenlicht's Super Nodes for combining Normal Maps and more
- added glTF Nodes group, plug in images and export
- renamed Tabs to reflect standard Blender and Unreal names
- redesigned Material/Shader workspace, now using Blenders preview objects
- added text tab to list all nodes under their categories as visual aid
- redesigned Sculpt workspace to give full Orthographic views on the sides and Perspective center
- added Theme Editor Tab for quick UI color/keymap changes/testing
- new color theme overall
- removed clutter via File Manager to improve load time
- switched font to Roboto to fall in line with UE4
- S & R now cycle through Select Tool Modes (Box, Circle, Draw) and Scale Tool Modes (Widget vs Cage)
0.5 Update:
Math Nodes from Hellgate94 & bandages bring a lot of helpful functions in Blender's Node Editor for Vector and Scalar Values:
-Lerp, Reflect, Tile, Mirror, Clamp, Remap Values and many more!
Bone Studio's Modify Pivot Add-on lets you manipulate object origins manually!
Jayanam's Batex Add-on allows for batch export from Blender to Unreal.
knekke & cgvirus combined forces to create the Instant Meshes Bridge Add-on, which connects Blender to the (free and separate) program Instant Meshes (https://github.com/wjakob/instant-meshes), which lets you re-topologize your mesh to a target face count. Quick and dirty, will need manual adjustment, but may help speed up LOD process.
And, the beginnings of Edit Mode refinements:
Ctrl - E - Extrude
Ctrl - R - Loop Cut
Ctrl - F - Inset Faces
Ctrl - B - Bevel
0.4 Update:
Node Editor Improvements:
- Right Mouse now finally opens the 'Add Node' menu, so all that Blueprint muscle memory will steer you wrong no longer (it still pans the editor, too!)
- Double clicking Left Mouse will add reroute nodes to all lines you move across
- Alt + Left Mouse cuts links (so does Middle Mouse, but I found it a bit uncomfortable)
- S + Click to add a Value node, M for math, U for texture coordinate, T for image texture, B for Bump
- Ctrl + Tab cycles forward through workspaces (like tabs in a browser)
- Scripting layout change
- Readme added in Scripting
- Increased UI scale from 1.1 to 1.2
0.3 Update:
Wayward Painter Tab - Inspired by Michael McCann of Wayward Art Company I built a template cube to test real time texture painting using roughness, metallic, emissive, and transparency maps that can be exported for use in Unreal
Texture Lerp Node - Unreal users know and love the lerp, Lateasusual and AnubisMaster figured out a node setup to plug in textures and keyframe them, meaning, 4 built in backgrounds that you can switch between by pressing Spacebar and letting the animation play, contains modded HDRIHaven blue sky image, modded space background from Pexels, as well as a light and dark World Grid material, or delete them and replace them with your own in the Material Designer Tab > World Shader
File Manager Tab - displays every info panel Blender has in one spot, looking for orphaned data, Blender version, full list of textures, materials, objects, etc? It's the one stop shop
- Ctrl click now duplicates objects and nodes, to resolve the conflict with Selection, you can now use Shift-LeftClick to Add to Selection and Shift-Ctrl-LeftClick to Remove from Selection
- Created RGBA Image node group, just a texture and rgb splitter with a more familiar packaging, helpful if you're regularly going to be working with RGB masks
And a special surprise, coming soon!
0.2 Update:
- Traditional Right-Click context menus mapped to Shift-Right Click
-Alt-Left Click now Rotates the view (make sure to center your selected object with the F key), Alt-Right Click now Pans the view - Thanks to u/deathclonic!
- Removed many conflicting keymaps across Object and Edit modes, opting for a more scorched earth method with keymappings, leaving the originals left too many conflicts, some that would only become apparent in very specific situations - Thanks to u/RealityRig!
- Scale has been adjusted for import and export, 1:1, no special scaling needed, however, Blender units are now quite small, so meshes can appear almost invisible when added to the scene, this will be addressed in a future update - Thanks to u/falola!
- Blender's Node Editor now behaves more like UE4, Right Click and drag will move the screen, select nodes and press C to wrap them in a frame (similar to Unreal comment boxes)
- Unreal Mannequin now has its original textures, normal maps and materials set up in EEVEE renderer
- Startup.blend now has all linked files packed in automatically, this should solve the pink sky issue (I hope...), as well as any file relinking issues with the UE4 Mannequin textures, but the file is now 130MB!
Many thanks to everyone who downloaded and tested the template, all your feedback and input is very much appreciated!
0.1 features:
- UE4 color scheme and window layout
- Left Click Select, Right Click Navigation (Hold Right Click, move with WASD) with Box Select, Add to Selection and Remove from Selection mapped to the same controls as in UE4 (Click and Drag, Shift-Click, Ctrl-Click)
- 3rd Person Template project from UE4 recreated in Blender w HDR lighting (from HDRIHaven.com) and LookDev view mode using EEVEE renderer lets you see exactly how assets will appear in UE4 https://hdrihaven.com/hdri/?c=partly%20cloudy&h=approaching_storm - Blender unit scale set to match UE4 (0.01), and UE4 mannequin is in startup scene to help with scale reference for design
- Widget based object manipulation: after selecting an object use the transform widgets to move, rotate and scale your objects with the mouse
- Widget controls mapped to match UE4: W - Move Tool, E - Rotate Tool, R - Scale Tool
- Other helpful shortcuts like: A - Select/Deselect All, F - Focus view on selected object
Future Updates planned:
- Add Common Items panel to the left side of the Viewport to have one click access to add Basic Mesh, Camera, Light, Reflection Capture etc, as in UE4
- Add macros to assist with tasks I most commonly use Blender for: optimizing meshes, UV mapping/remapping, modelling basic props and items, new FBX exporter, glTF exporter
Get Blunder
Blunder
App Template - Unreal UX in Blender (Default Blender Keymap based)
| Status | In development |
| Category | Tool |
| Author | Spectral Vectors |
| Tags | 3D, Blender, Unreal Engine |
More posts
- v0.7 and upSep 29, 2020
- 0.6.3 - More fixesJun 07, 2020
- v0.6.2 - Add-ons Update!Jun 06, 2020
- v0.6.1May 18, 2020
- v0.6May 12, 2020
- v 0.5 arrives!Aug 16, 2019
- v 0.4 - the drought is over!Aug 06, 2019
- Blunder v0.3May 15, 2019
Leave a comment
Log in with itch.io to leave a comment.